
| Home | Go for the GT5 look using vertex and fragment shaders! |
|
|
|
Introduction
This text describes some best practices to use to shade (and this sometimes means modeling) tracks. A start page on GPU shading in general is here. This page explains general shaders for generic surfaces. You can always divert from these procedures ofcourse - keep your creativity flowing.
Racer version used is v0.8.10 and up. Quick jumps in this page:
We use 3D Studio Max mostly. For the materials, we normally use 1 multisub material and hang all materials actually used in the track underneath this single multisub material. This allows us to export one big ASE of the entire track, then use TrackEd to 'Cut multisub ASE' and generate separate ASE files for all objects, importing those in a single go.
For the road we create a loft which generates the road, kerbs, grass and guardrails in one go.
Kerbs are UV-mapped along the loft, to go along with the bends. Grass and sand and such are mapped as a planar map. We'll see below that we can override this planar map using Cg shaders, which by default will use a mapping of 1m x 1m for one repeat of the texture. This can be scaled if the texture doesn't match a 1m x 1m representation.
A mixing shader can be used to line up the grass/sand maps and still use kerbs (for example) that have different mapping. This is explained in more detail below.
Beyond all the methods below, and using TOD (time of day) curves, there is another way to improve the atmosphere or feel of your track; you can colorgrade your track, which is basically a fast color correction trick to modify your coloring scheme at frame post-processing time.
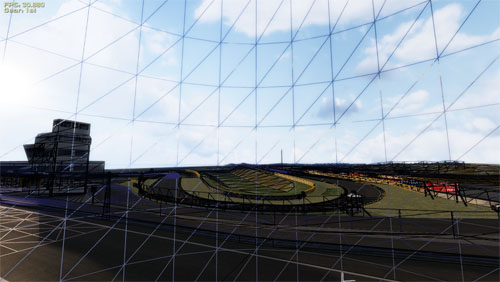
Skies in v0.8.9 onwards should be created as a static dome that covers the entire track. Sky flags that should make it move along with the camera are not guaranteed to work. It should be big then; we use a generic sky semi-dome (just a bit larger than half a sphere) of 20km radius that fits all our tracks (it will also fit the Nurburgring). The normals should point inwards and it should be tesselated somewhat, since some of the sky coloring is done per vertex, and not per fragment. Here is a wireframe render of what we use:
Integration into the track: for the geometry.ini file we use 'flags=0'. No flags are needed - the sky is painted as is.
The shader then (in track.shd):
vf_sky
{
  vertex_shader
  {
    file=sky_v.cg
  }
  fragment_shader
  {
    file=sky_f.cg
  }
}
shader_sky~vf_sky
{
  compression=0
  sky=1
  layer0
  {
    map=sky.tga
    texenv=replace
    depthwrite=0
  }
}
You may have to add 'cull=none' (after 'sky=1' for example) if your normals aren't correctly defined. The 'sky=1' is an indication to the renderer that it should extend the far render plane, which is normally around 1000-1500 meters. For big skies though (ours are 20km in radius) it extends the visibility to around 100km so the sky 3D model isn't clipped.
Since the sky Cg shaders take care of the sky color when considered cloudless, texturing the sky should be done with just clouds and alpha to determine where the clouds are visible. Notice the console command 'clouds <n>' with which you can set the amount of cloud dynamically (a scale on the texture's alpha value). So your sky texture should NOT look blue! Just a black & white image of clouds.
The sky shader uses the generic sky_v/f Cg shaders. These use a few settings from special.ini's 'sun' section, here are the relevant parameters:
More information also on atmosphere rendering backgrounds here.
Sand and grass - mixing
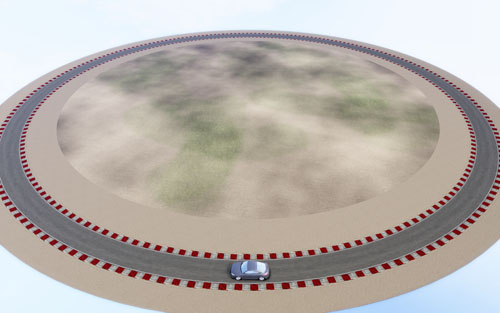
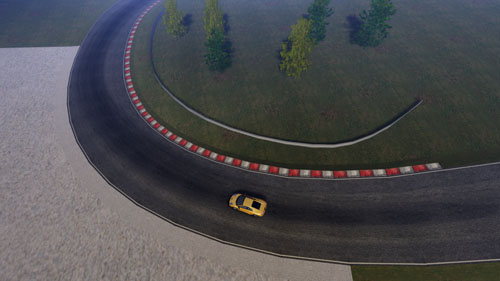
Have a look at the track below. For the center part, it has 1 material with 3 textures: a control texture, a grass and a sand texture. The control texture here determines 2 things: the amount of grass and sand (through the alpha channel) and a colorize/brightness scale in the control texture's RGB channels (where 50% gray is neutral). The alpha was just painted using a brush, the mixing is a cloud render (in Photoshop).
You can download this test track here (9Mb) to investigate it better (updated 12-3-2012 that fixes a track.shd layer ordering bug for Racer v0.8.38+).
Kerbs (and other delineations at the edge of the road)
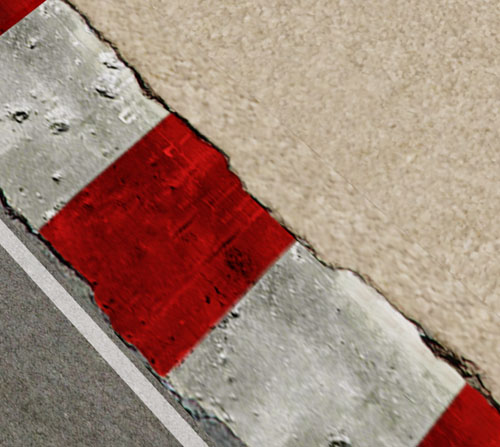
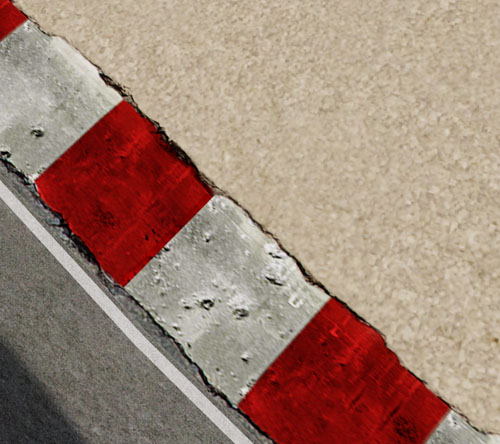
Beauty is in the detail. For kerbs, you could take a texture that just fits its rectangle perfectly. But it's quite static. So the next attempt is to make a texture that mixes kerbs & sand for example. But as the sand is mapped in a world mapping axis system, the direction change of the kerbs makes the sand not match up. See the image below (notice the line in the sand, indicating the change from the kerb polygon to the inner circle polygons):
A trick you can perform is to use standard_mix2w_f.cg, which uses 2 textures (kerb/gravel) where the alpha channel in the first (kerb) determines where it should mix in the 2nd texture in world coordinates. See below for the alpha channel of the kerb texture (painted using one of the RGB channels and then using Dodge/Burn brushes:
We now use the following shader:
vf_mix2w
{
  ; 2 textures with world mapping for the 2nd texture
  vertex_shader
  {
    file=standard_v.cg
  }
  fragment_shader
  {
    file=standard_mix2w_f.cg
  }
}
shader_curbsand~vf_mix2w
{
  scale=0.4
  layer0
  {
    map=curbsand.tga
  }
  layer1
  {
    map=gravel.tga
  }
}
This makes the kerb texture use its original UV (texture) coordinates, and the gravel texture use world coordinates as texture coordinates. This aligns the textures neatly:
The only real problem here is that you probably want the kerbs to be bumpmapped, so this example might be more suited for other grass transitions. Also, make sure to use the most prominent texture in the first layer; only that layer will be used while rendering projected lights (which is single-texture only).
Track decals (marks just on top)
To add things like skidmarks on top of the regular track, you can define extra polygons that float just above the regular track (a few centimeters at most). For this material, you want to avoid Z-fighting with the road underneath, so turn depthwrite off. This also internally makes sure the objects are drawn after drawing the (depthwrite=1) road. To use the alpha channel in the texture, make sure to use 'standard_transparent_f.cg' as the fragment shader.
vf_standard_transparent
{
  ; Shader for transparent (blended) materials
  vertex_shader
  {
    file=standard_v.cg
  }
  fragment_shader
  {
    file=standard_transparent_f.cg
  }
}
...
shader_road_tracks01~vf_standard_transparent
{
  layer0
  {
    map=road_tracks01.tga
    ; Dithering
    alpha_to_coverage=1
    ; Don't write depth; we're a decal - that makes sure Racer renders the road first, then the tracks on top
    depthwrite=0
    ;alphafunc=gequal 128
  }
}
Here is a screenshot from Carlswood where you can see the darker road tracks overlayed on top of the asphalt:
More examples...
(last updated November 13, 2012 )