| Home | Enhance the car with backfire - rally cars mostly. |

|
|
|
Introduction
Racer v0.8.30 introduced color grading, which was inspired by the Unreal SDK (see http://udn.epicgames.com/Three/ColorGrading.html). It was quite simple to implement. Probably, GT4 on the PS2 also used color grading in its post-processing stage to implement the 'Disco' mode, where fancy camera shots were used with impressive color grading to give a bit of a stylized look.
What it does is use a 16x16x16 teturemap (3D) to transform LDR colors to new colors. It does so per-pixel, and is a form of color correction. Using Photoshop makes it easy to generate these transformation maps.
Color grade maps are 2D images, stored as 3D on the graphics card. They are 256x16 in size (fixed) and can currently be specified per track. More might be possible in the future (such as color grades per location as well; for example if you are in a cave, you might want to transform the feel of the colors). It is also useful for specific rain/snow tracks where you want to desaturate things.
Specifying a color grade for a track
The default color grading image is data/images/colorgrade_default.tga. When making your own, this is your base image to work from.
Any track that does not specify a color grade image will use the default one. You specify the image in special.ini, under gfx.colorgrade. For example, if you set that to 'colorgrade_oldies.tga', Racer will attempt to load that image in your track folder. An example extract from a special.ini:
gfx
{
...
  colorgrade=mygrade.tga
...
}
Making color grade images
Here I'll explain how to make a color grade image using Adobe Photoshop. You can also read the Unreal link from the top for their look on things.
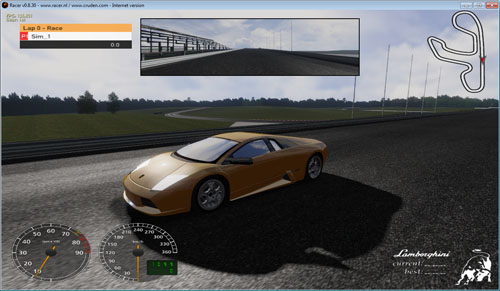
First step is to run Racer with a default colorgrade map. If needed, edit your track's special.ini and comment out gfx.colorgrade to get the default look. Then run Racer and take a representative shot of the track. Run Photoshop, run Racer and while Racer being selected, press Alt-Printscreen. Then switch to Photoshop, press Ctrl-N (new document), ENTER to accept the default settings and Ctrl-V to paste the screenshot:

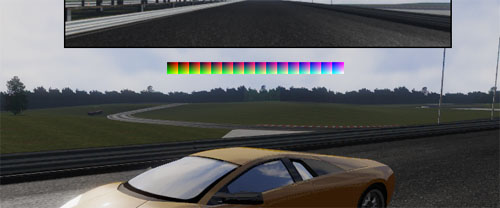
Next is to load the default colorgrade image (data/images/colorgrade_default.tga) and add that as a layer to your image: (here, I just loaded the colorgrade_default.tga, selected it with Ctrl-A ('Select All') and pasted it in the screenshot image). Move it to a non-conspicuous place.

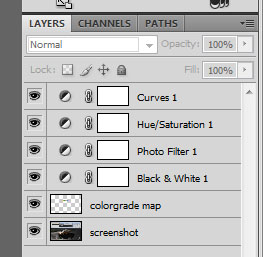
Then we start adding adjustment layers. Usable ones are those that only modify the coloring, so curves, hue/saturation/photo filters/black & white etc. Things like blur won't work; only color correction is applied later on in Racer. I've added a few layers here (a bit over the top for demonstration). You can load the example in PSD format here to check out the settings I used.

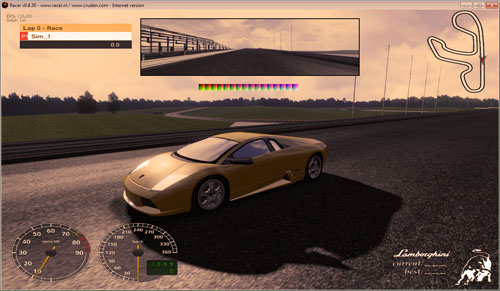
The image then looks for example like this (as I said, a bit over the top):

Note that by adding all the filters you've now generated that color grade map as well. It in fact maps RGB colors to the new colors. Press Ctrl and click on the layer which contains the default.tga map; that will select it.

Then select Image | Crop from the menu so all is left is that color grading. If you want to modify your map later on, save it as PSD before this step. You will now only have the color grading map in view:

Now save this map into your track directory, for example as 'mygrade.tga'. Then, in special.ini, set gfx.colorgrade to mygrade.tga.
Note the difference between TOD curves and color grading; TOD curves can come a long way in generating a look, but they are more limited and less easy to use for this type of after-effect. With colorgrading you can for example invert the image easily. Or perhaps make everything black & white except a certain color. That is left as the usual exercise for the reader.
(last updated November 13, 2012 )