| Home | For more precise control of your graphics, you will need shaders. |
|
|
|
Introduction
This document describes the shader engine that is used in Racer starting from v0.5.2. Note that much of the ideas of the shader definition is heavily inspired on Quake3's shader scripts (if only to reduce the learning curve). Although different in form (Racer uses .ini files), the syntax and options have much in common. Reading a document on Quake3 Arena's shader engine will probably help with understanding Racer's engine, if you have trouble understanding certain parts. However, do note that Racer's shader engine does not have the same amount of features that Q3 has. Some features are less suited to a racing simulation, or may just have not been implemented yet because of the amount of work or complexity.
For some example shaders, see the Shader tutorial.
What does the shader engine do?
The engine attempts to use the graphics card optimally, by minimizing state changes (such as texture switching, but also other states). Rendering order is also sorted based on the shaders. When possible, this is done only once after loading all the graphics. All in an attempt to speed up throughput to the graphics card.
General shader structure
Shaders are defined in .shd files, which take the form of .ini
files (as most other Racer files). Each shader must begin with 'shader_'; an
example for a shader name is 'shader_f3top'.
A shader consists of 2 parts:
Typical usage
Although usage might turn out slightly different from what I expect, something can be said about general uses of shaders. Shaders are normally named to reflect the main texture image they refer to. Since DOF files simply reference texture names (not shader names), the shader engine searches for a shader with the texture name to see if this is actually a more complex material than just a texture. So in essence the texture name IS the material/shader name and is as such referred to.
To distinguish shaders for models (DOF files) in different directories, they are prefixed with the directory which they target. For example, when loading a car 'x', first the file 'data/cars/x/car.shd' is loaded. A shader in car.shd indicated by the path 'shader_f3top' will be named 'data/cars/x/f3top' in the shader engine. After loading the .shd file, the models themselves are loaded (from the same data/cars/x directory). If the model loader encounters a material with the texture name 'f3top.bmp', it searches for shader 'data/cars/x/f3top' and so finds the correct (local) shader definition. Most of this happens in the background, so you only have to make sure that the shader file is in the same directory as the referred DOF and image files.
In the above, note that the extension of the file (.bmp, .tga etc) is ignored. As a result, do note use image filenames that differ only in their extensions! If you have a file named 'f3top.bmp' and 'f3top.tga', both will refer to the same shader. This obviously may lead to subtle problems (hard to track).
Debugging
To check whether your shader files are ok, it is often a good idea to check the QLOG file regularly for errors concerning the shader files. The QLOG file is either in the installation directory (Windows) or the user's home directory (Unix).
Parameter reference
See below for a complete reference on all the available parameters.
| Global shader parameters | Per layer parameters |
| ... | ... |
![]()
The 'cull' keyword indicates how polygons drawn with this shader need to be culled (if at all). The argument is:
| Cull | Explanation |
| front | all front-facing polygons are culled. |
| back | all back-facing polygons are culled. This is the default (and was used in Racer versions before the shader engine was introduced actually). |
| disable or none | no culling is used. Use this setting for objects like fences. |
Each shader can have fog turned on or off. This isn't
possible to do per layer (I don't think that's needed).
Setting the shader 'fog' line to 1 will turn on fog (default). It is often useful
to turn off fog (fog=0) for sky elements, that otherwise get too foggy. It's
better in those cases to turn off fog (faster) and use a foggy texture map instead.
Although the graphics engine sorts while rendering based on shader properties and object distances, sometimes you'll experience render order 'fighting'; objects flicker as some of their parts are rendered in different order. To counter this, you can add an explicit sort_offset into the global section of a shader definition.
The render engine uses an internal sort ordering system to roughly sort different types of shaders. These sorting orders are spaced 100 apart:
| Sort order | Ordinal | Description |
| SORT_PORTAL | 100 | Unused (remainder from Quake origins) |
| SORT_SKY | 200 | All sky=1 shaders. These are drawn first (compare drawing to painting a picture; you draw the sky first, then other things on top). May also be useful with panorama shaders. Normally these GPU shaders try to push the vertices close to the 'far' plane. |
| SORT_OPAQUE | 300 | Opaque shaders, such as piece of wood. |
| SORT_SHADOW | 400 | Unused. |
| SORT_BLENDED_ALPHAFUNC | 500 | Blended materials with an alphafunc active. |
| SORT_BLENDED | 600 | Blended materials without an alphafunc. |
| SORT_ADDITIVE | 900 | Additive materials, such as flares, projected lights, snow, some types of particles. |
| SORT_RAIN | 1000 | Rain (rendered quite late) |
| SORT_NEAREST | 1500 | Last stage. Seemingly used for billboards. |
The sort offset ranges from -99 to +99, where positive means render later than a shader with sort_offset=0. For example, the Lamborghini Murcielago has lights just below a transparent glass mesh. To make sure the glass renders on top of the lights, set shader_glass.sort_offset to 1. Also, if a track has a fence that is divided into big chunks, you can use sort_offset to avoid errors that can happen due to Z distance estimations (the fence being rendered too soon and overdrawn by other objects).
As you can see from the sort table above, using a sort_offset greater than 100 or less than -100 will move through a serious sorting boundary, and can mess up rendering order more than you can oversee.
Next to the visual properties of a shader (which are by far the most important aspect of shaders), you can also specify some physical properties.
| Property | Explanation |
| sky | If 1, this shader specifies a material for the sky. Often, sky objects are renderered quite far away. Normal objects are clipped to a far plane which may not be further than about 500m away. To allow for sky objects to render ok, use sky=1 to indicate this shader is part of a sky object. The far plane will then be set far away for this object only (some 100 kilometers away), so the object renders ok and doesn't get clipped. |
The shader also contains a variable to modify some purely graphical properties.
| Property | Explanation |
| motion_blur | If set to 0, this will disable motion blurring this material during velocity map generation passes. This means the material goes unblurred. Useful for wheels; Cg shader based motion blur doesn't work nicely on wheels because of the linear nature of the blurring being done. Just using blurred textures on a wheel is much better. |
| tangents | If set to 1, tangents are passed to the model. This is needed for bumpmapped materials. Although this breaks compatibility with v0.8.2, passing of tangents is normally only required for bumpmapped models, and it saves time (so framerate) if this passing is skipped. |
| mipmap_bias | (v0.8.38+) Defines the mipmap level, normally used to specify the mipmap level of cubemaps (environment map mostly) to use. Mipmapping the environment map is done using racer.ini's envmap.generate_mipmaps setting (0=off, 1=on). Setting that to 1 will generate mipmaps of the environment map. This 'mipmap' setting then controls which mipmap level is used. 0=top level, >0 = lower levels (for example, 1, 2, 3...). Note that mipmapped levels are blurrier, so are generally useful for softer reflections. You can also set the mipmap_bias per layer if you want, see that section below. All reflective shaders that input a cubemap support this mipmap_bias=xxx property. |
(Available since v0.5.3 beta 8) Use the vertex_shader and fragment_shader options to define Cg shader programs for a world of added graphics power (so take note; Racer 'shaders' are material definitions which can have vertex & fragment shaders as part of them; unfortunately the term 'shader' is used in 2 different contexts here). The property shader_*.vertex_shader.file indicates the file to use for vertex shaders, similar to fragment shaders which use shader_*.fragment_shader.file.
More information on parameters available in Cg shaders can be found at the Racer GPU Shaders page.
Cg was created by nVidia as a general purpose GPU shader language. It looks quite a bit like C++ although it has severe limitations due to the fact that you use these little programs to modify vertex & fragments. See http://developer.nvidia.com/object/cg_tutorial_teaching.html as a start, or try Google.
Currently the options for specifying GPU shaders are:
| Property | Explanation |
| file | The Cg filename to load, i.e. 'cg/wavy.cg'. The file is loaded relative to the car or track, i.e. if you specify 'wavy.cg' the file loaded is data/cars/<yourcar>/wavy.cg. |
Coming up.
Note that global material properties have been defined since v0.7.2. This version introduces passing of material properties to Cg shaders. As most Cg shaders will only use 1 pass, the need for a global material definition became apparent. Note though that the global material properties are actually stored in the 1st layer! This means that if you define global material properties, the first layer's properties will be overruled.
These properties are passed to Cg shaders (see GPU shaders) as Ka (ambient), Kd (diffuse), Ke (emission), Ks (specular) and 'shininess'.
You can specify shininess, specular color and emission; all material properties. Note that if these do not stay constant in the entire shader, multiple separate rendering passes will be used (less efficient).
| Material property | Description |
| ambient | Ambient color in RGBA format. Defaults to 0.2 0.2 0.2 1 (v0.7.1+) |
| cast_shadow | (v0.8.14+) If set to 1 (the default), this shader will render when generating shadowmaps for shadowing. You can turn it off (set it to 0) to disable shadow casting. Useful for grass for example |
| diffuse | Diffuse color. Defaults to 0.8 0.8 0.8 1 (v0.7.1+) |
| shininess | A value from 0 to 128, indicating the shininess of the material. 0=dull, 128=supershiny. Try starting with a value like 50, otherwise specular highlights may become too sharp. Specular highlighting this way is per vertex, so be careful with parts of road; those have few vertices generally. |
| specular | Specular color, in RGBA format (where every color ranges from 0 to 1). Defaults to 0 0 0 1. Use for example 1 0 0 1 to get red. Note that you can separate materials in 2 types: dielectric (such as wood, plastic) and conductors (every metallic). Dielectric materials have the property that the specular light is of the same color as the original light source. I.e. a white lamp on a piece of wood will give a white specular highlight. For conductors, the specular highlight will take the color of the material instead; so a white lamp shining on a piece of gold will produce a golden-colored specular highlight (NOT a white one!). This effect is explained in more detail at Manufato.com. Notice that you can partially reproduce the effect in Racer, but really what is needed is either a parameter in the GPU shaders, or extra shaders that differentiate between dielectric and conducing materials. For golden materials for example, you can set specular to a yellow/brownish color. Things are not so easy with dielectric materials; the specular color should be calculated from the diffuse color, which is really what the diffuse texture specifies (not really the 'diffuse' property mentioned just above). For objects that are more or less the same diffuse color all over, you can use 1-diffuse for the specular color for good effect. For example, if diffuse=0 1 0.25, your specular would read specular=1 0 0.75. Perhaps a solution would be to allow specular maps, although it is probably faster to have a dielectric shader that calculates specular color as 1-diffuse color. |
| emission | Emissive color. As specular color, only this is the emissive color of the material. |
| reflect | Reflectivity, ranging from 0 to 1. Values above or below 0 and 1 are allowed, although the physical correctness may not be right. Available since v0.7.4 and only in conjunction with Cg shaders (passed as 'Kr'). |
| fresnel.bias | Fresnel parameter. Defaults to 0.1. All fresnel parameters are only available with Cg shaders. (v0.8.10+). I.e.: fresnel |
| fresnel.scale | Fresnel linear dependency. Defaults to 0.9. |
| fresnel.power | Fresnel power (sharpness). Defaults to 2.0. |
| bounce_amount | For projective lights, this is a scaling factor for the diffuse texture when rendering the light passes. Defaulting to 1, if this is lower than 1 (upto 0), the shaded material will appear less lit. With values >1, the material will light up more. This last one is probably the only useful variant, for objects such as reflective road signs. (v0.8.21+) |
| bounce_alpha | The projective light pass takes the first texture of the shader and blends this additively to the image. It blends lighting through the alpha channel of this diffuse texture by default, to allow for trees for example, where you want to cut out the tree shape when doing lighting. For some materials, like roads, this may not be the intention. If you have an alpha channel defined on your road texture for example, the light will appear to dim according to its alpha channel. Setting bounce_alpha to 0 (or a value <1.0) will bring back alpha when blending. A value of 1 is useful for trees (and the default); a value of 0 is useful for roads where you have some info in the alpha channel, but don't want that to influence the projective lights. (v0.8.21+) Examples: bounce_alpha=1 and bounce_amount=1 (alpha influences lighting, normal bounce). Notice the lighting appears too dark.
Next is bounce_alpha=1 and bounce_amount=2 (more bouncing):
Although we get more light, it still looks funny, since the road's alpha channel contains those 2 lit-up lines. Next, try bounce_alpha=0 and bounce_amount=2:
This is better, but the amount is perhaps exaggerated. The best choice, I think, would be bounce_alpha=0 and bounce_amount=1:
|
An starting point for a shiny road is roughly to set shininess at 10, and specular at 0.2 0.2 0.2 1.
Each layer can have its own depth function. It is selected by a 'depthfunc=...' line. This works as follow: fragment_z value FUNC framebuffer_z. So the default depth function of 'lequal' means that the depth function only passes (meaning the fragment will be written) if the fragment's Z position is less than or equal to the value currently in the Z-buffer. Possible values are:
| Depth function | Explanation |
| never | Never pass the depth test |
| always or none | always pass the depth test; this effectively turns off depth testing (faster) |
| less | fragment Z value must be less than what's in the depthbuffer |
| lequal | less or equal |
| equal | exactly equal |
| gequal | greater or equal |
| greater | greater than |
| notequal | unequal to the value in the depthbuffer |
Performance note: changing depth functions between layers means no single-pass multi-texturing can take place to combine the 2 layers with different depth functions.
For each layer you can define whether the depthbuffer (Z-buffer) is written or not. Default is 1 (depthbuffer is written to). With 'depthwrite=0' you can turn off depth writes for the layer. Normally, transparent shaders will have depthwrite=0 and opaque ones have depthwrite=1 (the default).
Each layer can have its own alpha function. It is selected by a 'alphafunc=...' line. Fragments (pixels) not passing the alpha test won't be drawn. This is useful to make transparent objects that do write to the Z-buffer but are still see-through. You can use it for trees for example; if many trees overlap, you want to use Z-buffering, but still make the trees seethrough; use 'alphafunc=gequal 128' for example. This will not render any pixels that are more than half transparent (and not update the Z-buffer for those pixels).
The reference value (which is needed for most functions) is a value from 0..255. Also note that different layers that have different layer functions can NOT be multitextured (rendered in combination), so be careful about the performance if you use multiple layers with different alpha functions. Possible values are:
| Depth function | Explanation |
| never | Never pass the alpha test |
| always or none | always pass the alpha test; this is the default |
| less <ref> | fragment alpha value must be less than the reference value |
| lequal <ref> | less or equal |
| equal <ref> | exactly equal |
| gequal <ref> | greater or equal |
| greater <ref> | greater than |
| notequal <ref> | unequal to the reference value |
Performance note: changing depth functions between layers means no single-pass multi-texturing can take place to combine the 2 layers with different depth functions.
Blending (mixing with the destination image) is relatively expensive, and quickly causes ordering issues (what to draw first). An alternative that works when anti-aliasing your screen is alpha-to-coverage. This technique uses the amount of 'alpha' to define a 'coverage' grid of pixels; a sort of on/off grid. The nice thing about this grid is that is works as a mask, and can be used in combination with Z-buffering, making the ordering issues disappear, as well as the need to blend.
To change a blending shader into an alpha-to-coverage layer, turn off the blendfunc, and set the layer's alpha_to_coverage property to 1. You probably need to tune the alphafunc value to make the masking thinner or thicker. An example shader that uses alpha to coverage goes like this:
vf_standard_transparent
{
  vertex_shader
  {
    file=standard_v.cg
  }
  fragment_shader
  {
    file=standard_transparent_f.cg
  }
  diffuse=1 1 1
  ambient=1 1 1
}

shader_bush~vf_standard_transparent
{
  cull=none
  layer0
  {
    map=bush.tga
    alphafunc=gequal 50
    alpha_to_coverage=1
  }
}
This will use depthwrite=1, but because of the alpha to coverage masking, it will appear transparent. The quality of the look is dependent on the amount of anti-aliasing, but for things like trees and bushes this is quite ok. Things like see-through glass may be better off using actual blending.
Alpha to coverage looks a bit like this:
This is the basic necessity of a layer; a texture map (an image). Note that (for crossplatform's sake) every map will be converted to lowercase. This enables Windows track creations to work on Linux with little effort. A map is specified in layer<x>.map and can take the following values:
| Value | Explanation |
| <filename> | A regular 2D image from a file. The most often used type. |
| $cubemap0 | See $trackenvmap. Note that cubic envmapping is not turned on automatically; you'll have to set texgen_s, t and r to reflection_map. |
| $trackenvmap | The track environment map. Used for cars, this cubic envmap can be updated live if you turn on gfx.ini's envmap.live_track (set it to 1). Very costly though. Synonym to $cubemap0. |
| $tracksunmap | A track's sun environment map. You could fill this in (data/tracks/<mytrack>/sun_*.tga) to use a sun reflection map. This would perhaps be able to get you near the sun reflections that exist in Gran Turismo 3. |
| $mirror | The mirror texture. This texture is updated live to match the rear view of the car (v0.5.2b5.1+). |
| $normalizemap | Used in bump-mapping. This normalizes input vectors for use with dot3 bumpmapping. |
In v0.8.20, you can also specify the image type in layer<n>.mode. Use 'srgb' for images obtained from regular cameras, and 'linear' for generated images like bumpmaps. Notice that alpha remains unchanged. Any srgb image (the default) will have a gamma of 0.45 applied.
You can specify shininess, specular color and emission; all material properties. Note that if these do not stay constant in the entire shader, multiple separate rendering passes will be used (less efficient).
Unclear is whether the colors (specular/emission) can actually have negative R, G, B and A values (upto -1)?!
| Material property | Description |
| ambient | Ambient color in RGBA format. Defaults to 0.2 0.2 0.2 1 (v0.7.1+) |
| diffuse | Diffuse color. Defaults to 0.8 0.8 0.8 1 (v0.7.1+) |
| shininess | A value from 0 to 128, indicating the shininess of the material. 0=dull, 128=supershiny. Try starting with a value like 50, otherwise specular highlights may become too sharp. Specular highlighting this way is per vertex, so be careful with parts of road; those have few vertices generally. |
| specular | Specular color, in RGBA format (where every color ranges from 0 to 1). Defaults to 0 0 0 1. Use for example 1 0 0 1 to get red. |
| emission | Emissive color. As specular color, only this is the emissive color of the material. |
An starting point for a shiny road is roughly to set shininess at 10, and specular at 0.2 0.2 0.2 1.
To mix layers, you need to use a blending functions for every layer beyond layer0. So layer1, layer2 etc. all need a 'blendfunc=...' line. Otherwise the previous layers wouldn't be visible. Each blendfunction contains two factors; the first for the source (texture pixels) and the 2nd for the destination (previous layer or framebuffer). Note that not all blend factor mixes may be supported by the hardware.
The possible blend factors are:
| Factor | Explanation |
| zero | 0 |
| one | 1 |
| dst_color | the destination color (what's in the framebuffer) |
| one_minus_dst_color | 1-dst_color |
| src_color | Source color |
| one_minus_src_color | 1-src_color |
| src_alpha | the texture's alpha channel value |
| one_minus_src_alpha | 1-src_alpha |
| dst_alpha | destination alpha in the framebuffer (may NOT be present!) |
| one_minus_dst_alpha | 1-dst_alpha |
| src_alpha_saturate | never lowers the alpha value |
In addition, some often-used abbreviations can be used as the blend function:
| Factor | Explanation |
| add | abbreviation for 'one one'; additive |
| filter | darkening filter, same as 'zero src_color'. Note that Quake3 defines this as 'dst_color zero'. |
| blend | samen as 'src_alpha one_minus_src_alpha'. This is a standard mixing blend function. |
Often you'll use the global shader mipmap_bias setting (see above) to define a mipmap bias (level) for each layer. You can overrule the mipmap_bias per layer though. This can be useful perhaps for metallic shaders for example, where you have a more diffuse layer and a lacquer layer, where each layer has its own amount of blurring.
See also Texture Filtering below.
The texture environment can be set with 'texenv=...'. This defines how lighting affects the textured pixels.
| Coordinate generation | Explanation |
| modulate | the default; modulates the vertex colors with the lighting (so the polygon's lighting state is affected by the sunlight) |
| replace | Doesn't use lighting information; the pixels are directly used. |
| add | Additive; texture pixels are added to what's underneath. |
| add_signed | Additive, only signed, so negative adds are also possible |
| subtract | The inverse of additive. |
| constant | Constant color. |
| interpolate | ? |
| src_color | ? |
| one_minus_src_color | ? |
| src_alpha | ? |
| one_minus_src_alpha | ? |
| texture0-texture7 | ? |
| previous | Previous texturemap? |
| primarycolor | ? |
| texture | ? |
| dot3_rgb | Dot3 (bumpmapping), see GL_DOT3_RGB_ARB. Not yet supported (v0.5.3 beta 5). |
| dot3_rgba | Dot3 only using alpha as well. |
| combiner <src> <op> | Combining in a more complex way. |
| combiner <src> <op> <src2> | Texture combiner using 2 sources and 1 operand. |
With 'mipmap=...' you can define whether the texture uses mipmapping (1) or not (0). Uses mipmap_min_lod (default: 0) and mipmap_max_lod (default: 1000) to define the LOD range from which to choose. For example, use mipmap_max_lod=2 on a road texture to avoid too much blur (at the cost of rendering speed). Note that min_lod/max_lod may NOT be listened to in Racer, since ATI/AMD drivers seem to crash when it's being used (setting OpenGL's GL_TEXTURE_MIN_LOD crashes the card, even when setting it to its default value). Use mipmap_lod_bias to set LOD biasing; defaulting to 0, a value above 0 makes mipmapped textures kick in sooner, a value <0 'delays' the use of mipmaps until pixels are further away. This feature is not supported for ATI graphics cards.
If you want to check how your texture level-of-detail usage looks (for example how the resolution of your texture matches with which mipmaps are actually used in rendering, check out the 'Testing mipmapping with stub textures' page. That page explains how to visualize the mipmaps used onscreen (which is really resolution-dependent, so be a bit careful).
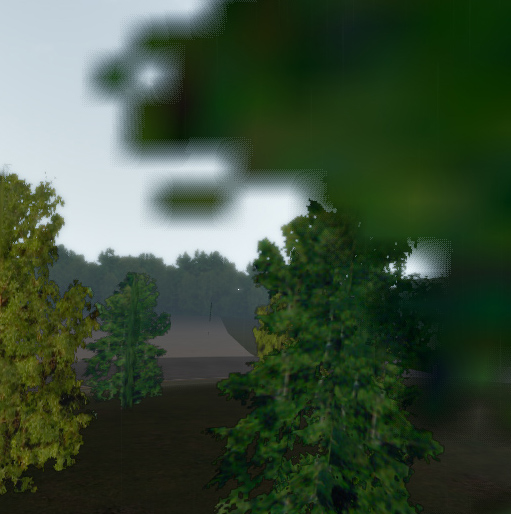
Some textures need to be repeated over an object (this is the default), but sometimes you want the texture to end after having been applied once, for example for treelines. For example (in treelines), due to rounding in texture coordinates you would see the bottom part of the trees just shimmering through at the top of the texture (which is mostly empty). In that case, using clamp_to_edge on the layer with the tree texture. An example is given in the image to the right; the woods01 object in CarlswoodNT has wrap_t=clamp_to_edge applied since v0.5.2. 4 wrapping parameters are loaded: wrap_s, wrap_t, wrap_r and wrap_q. They determine the wrapping in each texture direction (often only s & t are used). Wrap_q is probably never used. |
 |
| Texture wrap | Description |
| repeat | The default wrapping value. This will repeat the texture over the polygon in the given direction. |
| clamp | Once applied once, the texture will clamp at its end. |
| clamp_to_edge | Like clamp, only more useful for things like treelines, where otherwise part of the texture would repeat at the outer edge of the polygon. |
Layer - texture coordinate modification
For some layers, you may want to modify the texture coordinates. For example, a detail texture generally requires a more dense view, say 4 to 8x that of the underlying (less detailed) texture. This is done by passing every texture coordinate through a texture matrix (hardware accelerated by the way).
| Texture matrix option | Description |
| texscale | Texture coordinate scaling. Useful for detail textures. Accepts a single scaling parameter, which is used for 3D scaling (sets texscale_s, texscale_t and texscale_r). |
| texscale_s | Sets texture scaling for S only (this is the first, X coordinate). If you're used to UV texture coordinates, this is U. |
| texscale_t | Texture scaling for T. In UV coordinate style this would be V. |
| texscale_r | Same for the 3rd texture coordinate. Not really useful probably (texture coordinates are mostly 2D). |
| texscale_q | 4rd texture coordinate. |
Layer - texture coordinate generation
Instead of explicit texture coordinates, there are a couple of modes to automatically generate texture coordinates. Use 'texgen_s' and 'texgen_t' to set the S and T texture coordinate generation functions. S and T are like UV coordinates that most modeling packages tend to use.
| Coordinate generation | Explanation |
| object_linear | fixed to the object, a plane is defined on which the texture appears mapped. NYI. |
| eye_linear | decoupled from the object, the object will appear to 'swim' through the texture when moved. This will probably prove useful for track object shadows (like an overhanging ad post that casts a shadow on the cars driving below). NYI. |
| sphere_map | a simple environment map (as used in Racer v0.5.0 and older). This is useful for simple reflections (otherwise, try to use cube maps). The sphere_map is available on most graphics hardware. |
| reflection_map | Cubic reflection map. For this to work, you'll need to enable it for all coordinates s, t and r (texgen_s, texgen_t and texgen_r). |
| normal_map | Cubic normal map. Also S, T and R are used here. |
(last updated February 27, 2013 )